Training your own AI model is a lot easier than you probably think.
I'll show you how to do it with only basic development skills in a way that, for us, yielded wildly faster, cheaper, and better results than using an off-the-shelf large model like those provided by OpenAI.
But first, why not just use an LLM?
In our experience, we tried to apply an LLM to our problem, like OpenAI's GPT-3 or GPT-4, but the results were very disappointing for our use case. It was incredibly slow, insanely expensive, highly unpredictable, and very difficult to customize.
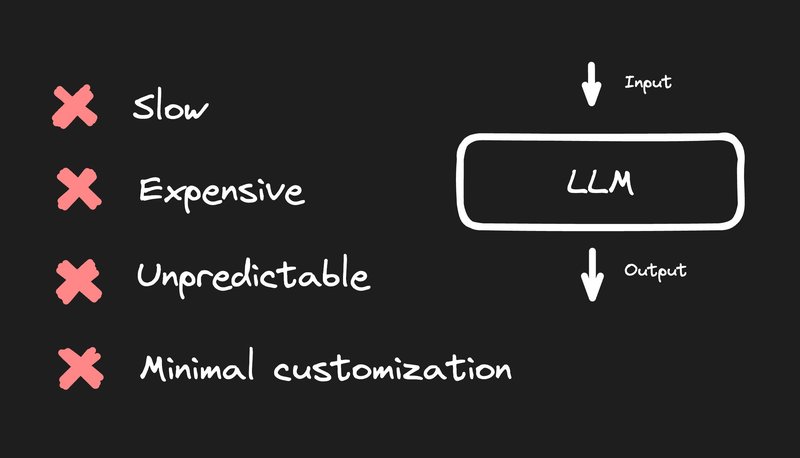
So, instead, we trained our own model.
It wasn't as challenging as we anticipated, and because our models were small and specialized, the results were that they were over 1,000 times faster and cheaper.
And they not only served our use case better, but were more predictable, more reliable, and, of course, far more customizable.
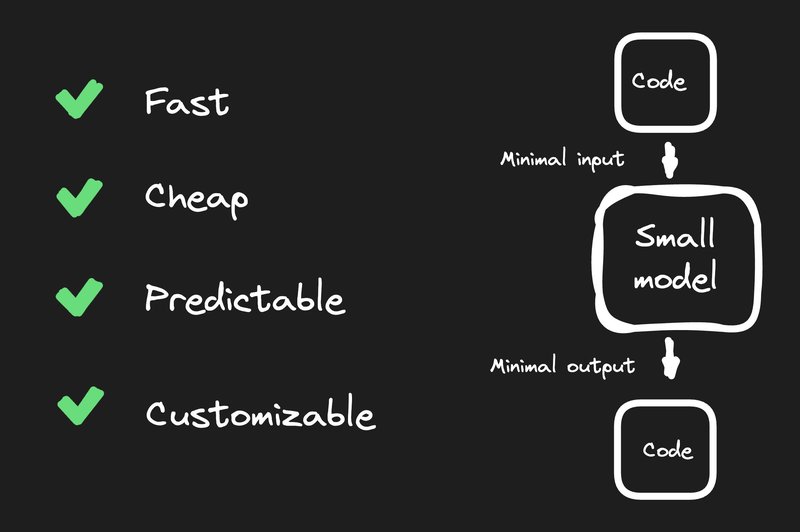
So, let's break down how you can train your own specialized AI model like we did.
First, you need to break down your problem into smaller pieces. In our case, we wanted to take any Figma design and automatically convert that into high-quality code.
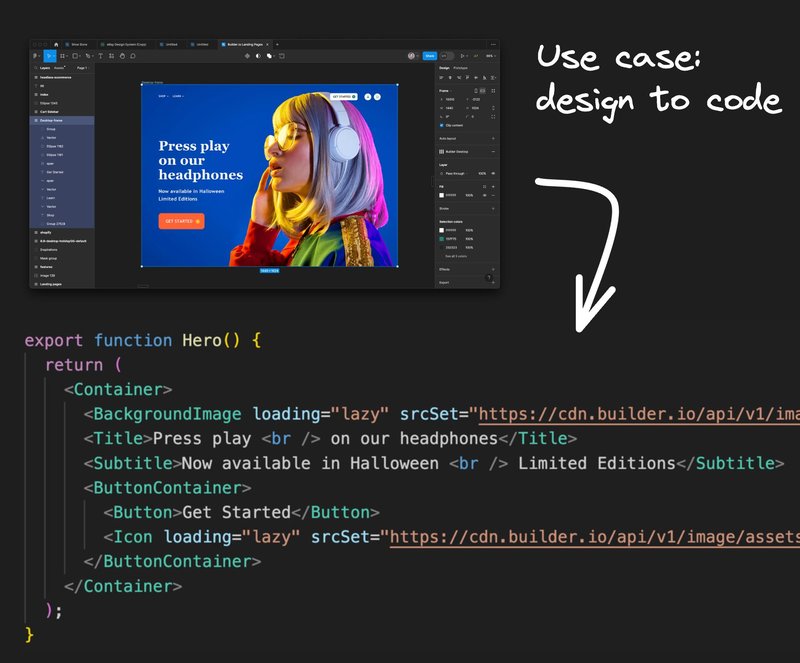
In order to break this problem down, we first explored our options.
The first thing I'd suggest you always try is… basically what I just suggested not to do, which is to see if you can solve your problem with a preexisting model.
If you find this effective, it could allow you to get a product to market faster and test on real users, as well as understand how easy it might be for competitors to replicate this.
If you find this works well for you, but some of those drawbacks I mentioned become a problem, such as cost, speed, or customization, you could train your own model on the side and keep refining it until it outperforms the LLM you tried first.
But in many cases, you might find that these popular general-purpose models don't work well for your use case at all.
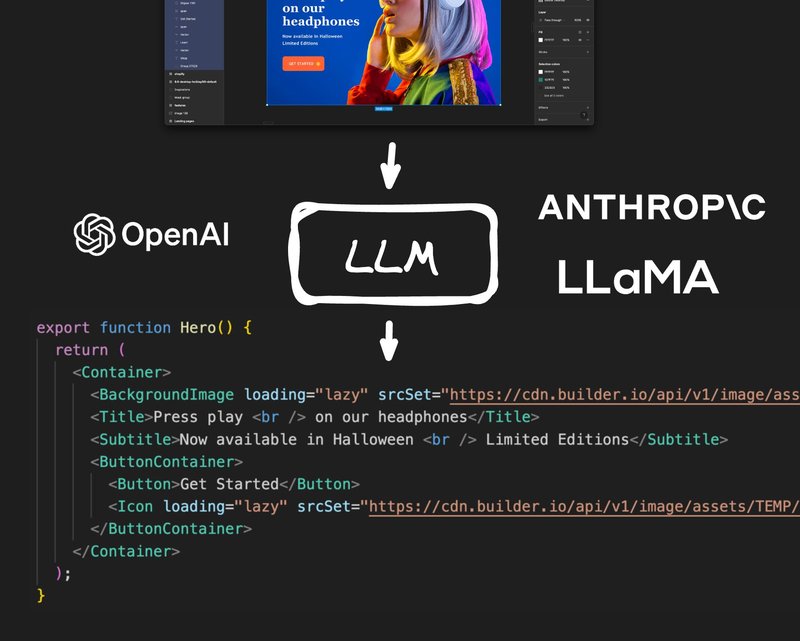
In our case, we tried feeding it Figma designs as raw JSON data and asking for React components out the other side and it just frankly did awful.
We also tried GPT-4V and taking screenshots of Figma designs and getting code out the other side and similarly, the results were highly unpredictable and often terribly bad.
So if you can't just pick up and use a model off the shelf, now we need to explore what it would look like to train our own.
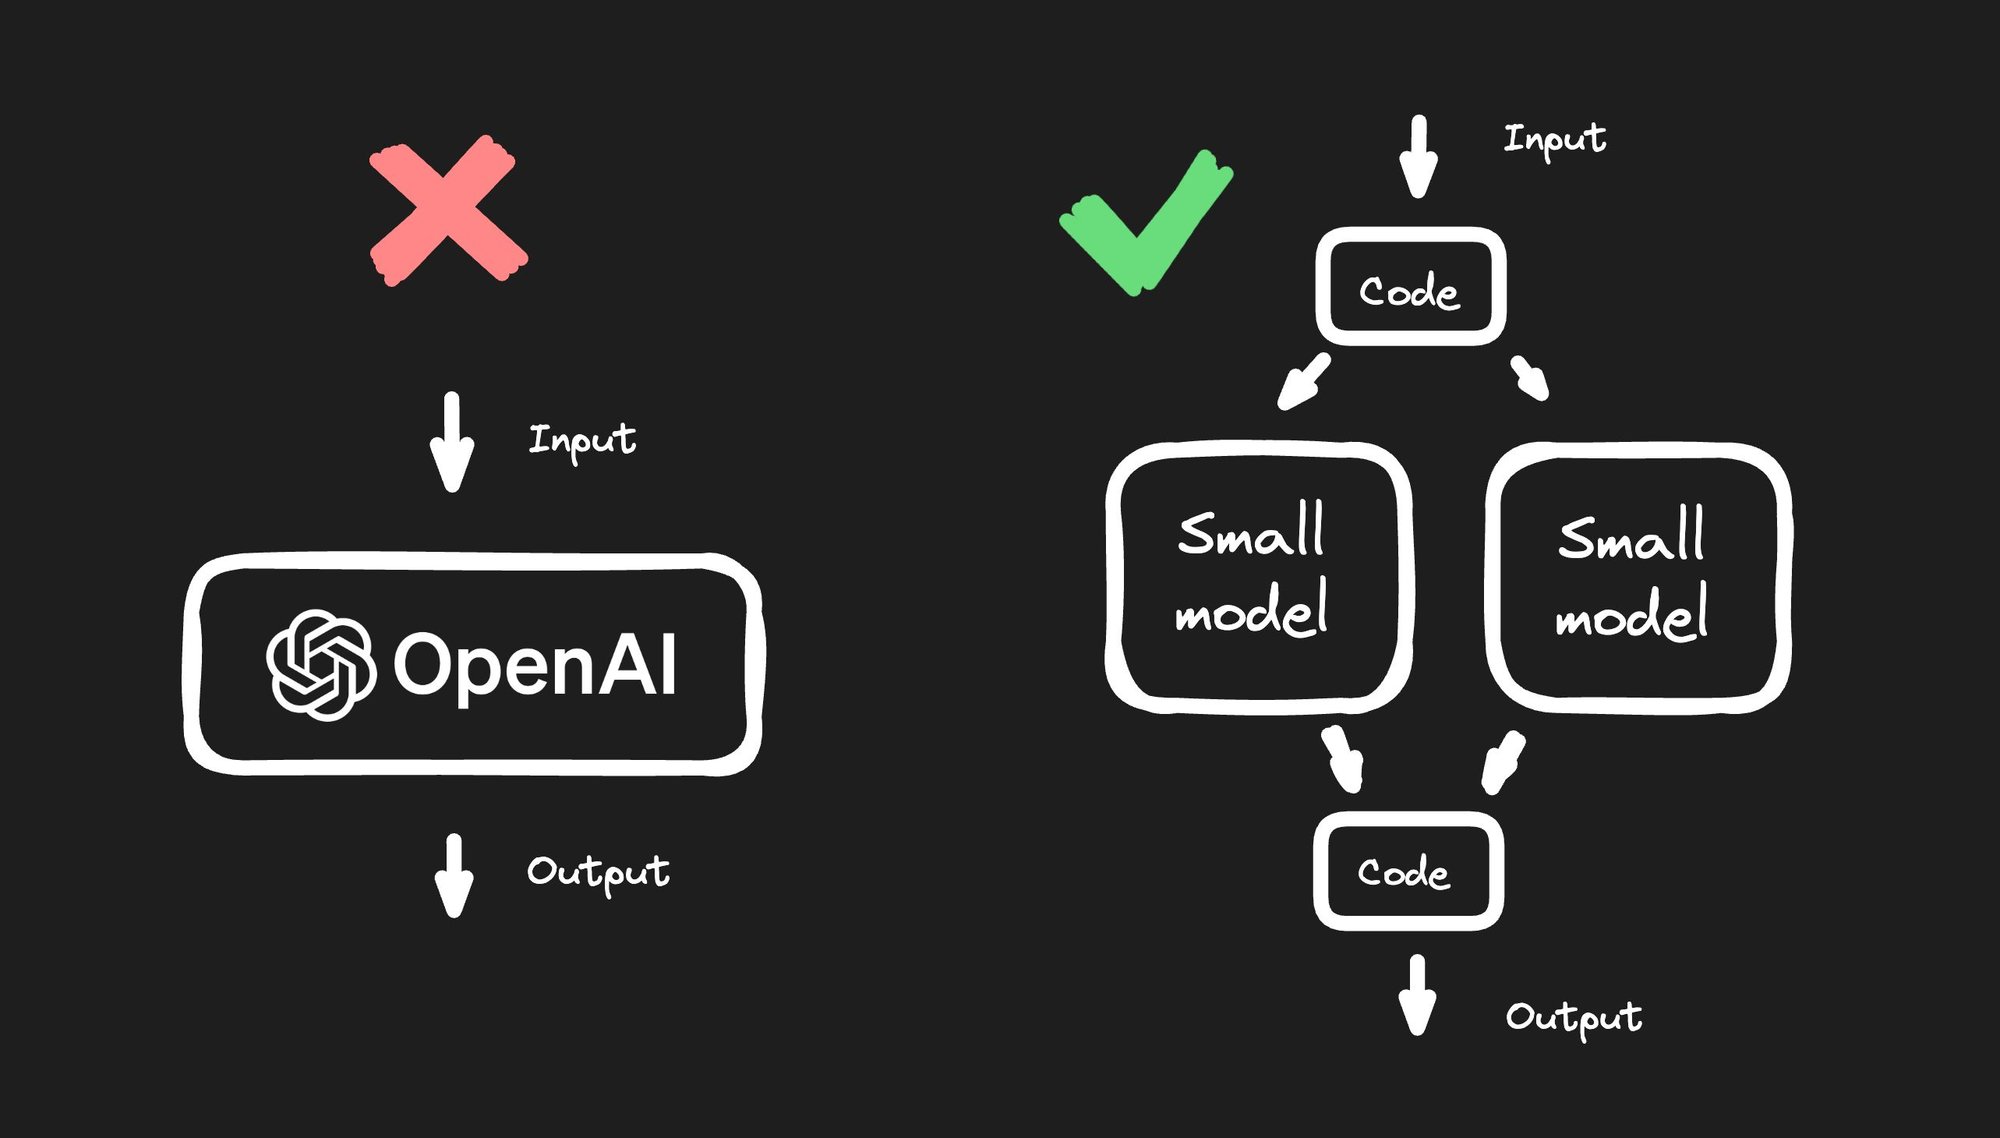
A lot of people have the intuition that they should just make one big giant model where the input is the Figma design and the output is the fully finished code. We'll just apply millions of Figma designs with millions of code snippets, and it will be done; the AI model will solve all our problems!
The reality is a lot more nuanced than that.
First, training a large model is extremely expensive. The larger it is and the more data it needs, the more costly it is to train and to run.
Large models also take a lot of time to train, so as you iterate and make improvements, your iteration cycles can be days at a time waiting for training to complete.
And even if you could afford that amount of time expense and have the expertise needed to make these large, complicated custom models, you may not have any way to generate all the data you need anyway.
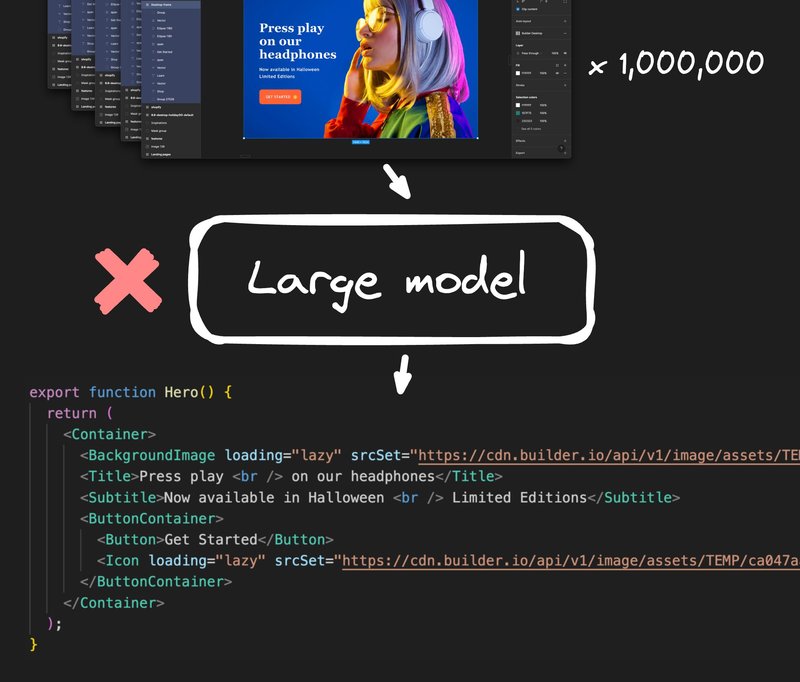
If you can’t find this data on the open web, then are you really going to pay thousands of developers to hand code millions of Figma designs into React or any other framework, let alone all the different styling options like tailwind versus emotion versus CSS modules?
This just becomes an impossibly complex problem to solve. As a result, a super-duper model that just does everything for us is probably not the right approach here. At least not today.
When you run into problems like this, I would highly recommend trying to swing the pendulum to the complete other end and try as hard as you can to solve as much of this problem as possible without AI whatsoever.
This forces you to break the problem down into lots of discrete pieces that you can write normal, traditional code for and see how far you can solve this.
In my experience, however far you think you could solve it, with some iteration and creativity, you can get a lot farther than you think.
When we tried to break this problem down into just plain code we realized that there were a few different specific problems we had to solve.
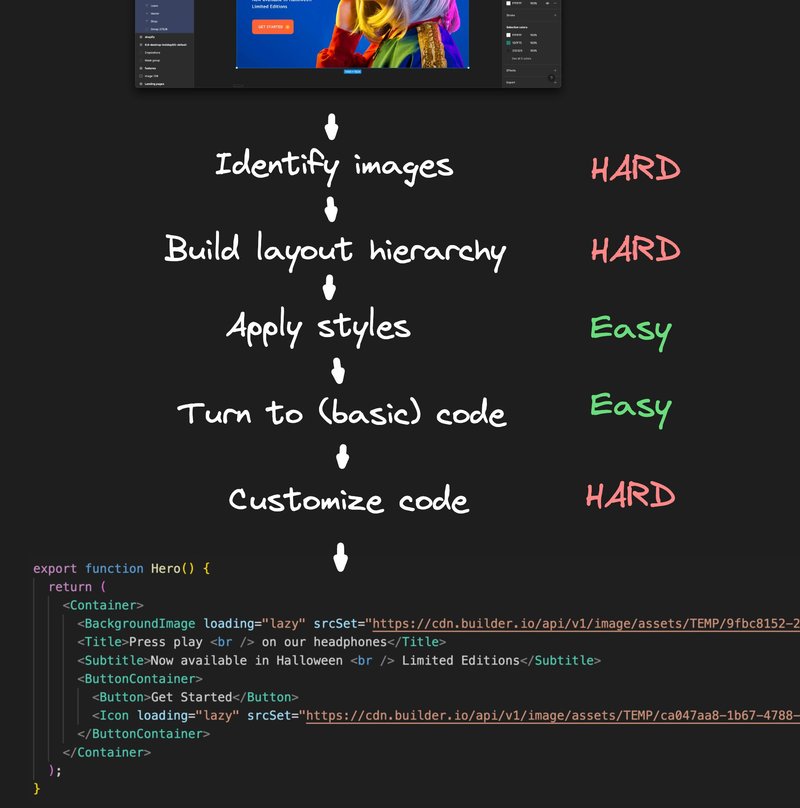
In our findings, at least two of the five problems were really easy to solve with code: applying styles to Figma to CSS/native styling and generating basic code from a predefined layout hierarchy.
Where we hit challenges was in those other three areas: identifying images, building layout hierarchies, and customizing the final code output.
So, let's take that first step of identifying images and cover how we can train our own specialized model to solve this use case.
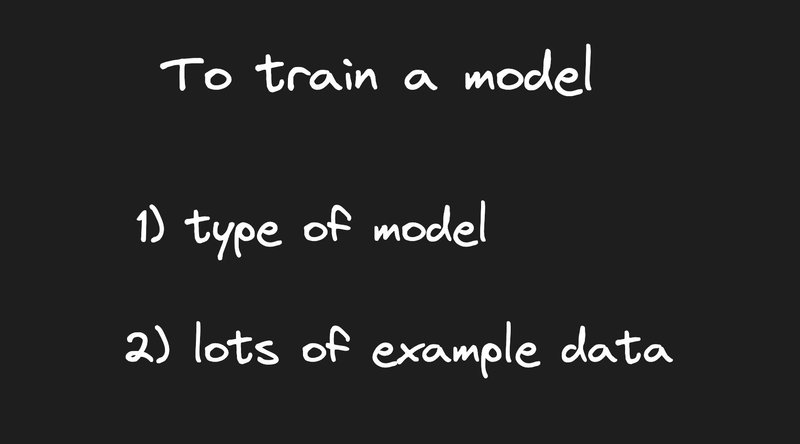
You really only need two key things to train your own model these days. The first is you need to identify the right type of model for your use case, and second, you need to generate lots of examples of data.
In our case, we were able to find a very common type of model that people train is an object detection model, which can take an image and return some bounding boxes on where it found specific types of objects.
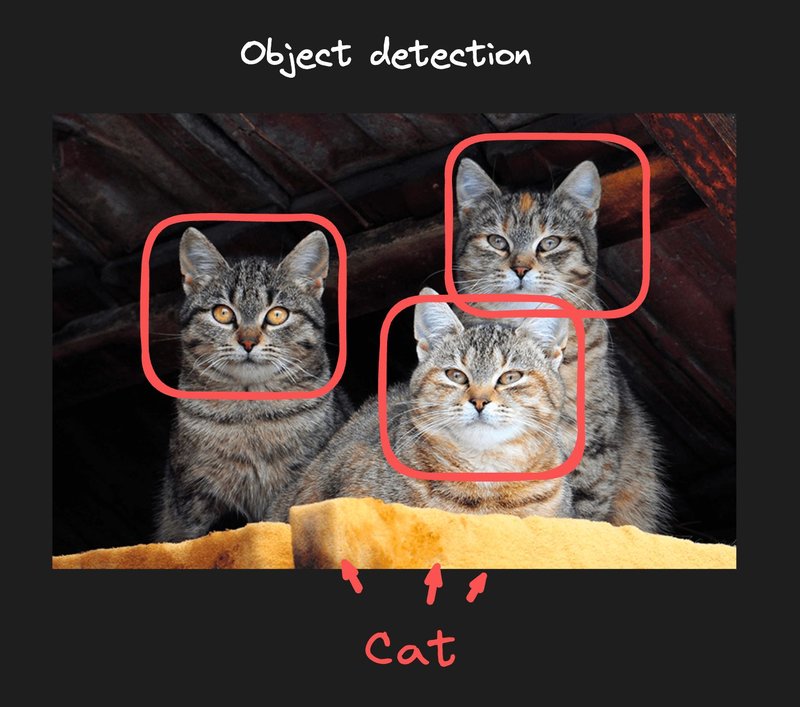
And so we asked ourselves, could we train this on a slightly novel use case, which is to take a Figma design, which uses hundreds of vectors throughout, but for our website or mobile app, certain groups of those should really be compressed into one single image, and can it identify where those image points would be, so we can compress those into one and generate the code accordingly.
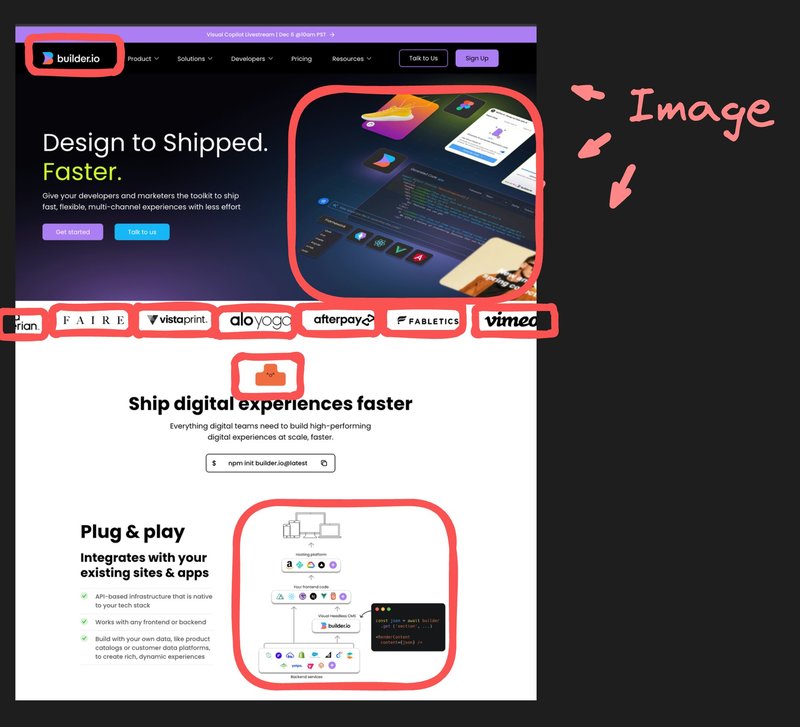
So that leads us to step two. We need to generate lots of example, data and see if training this model accordingly will work out for our use case.
So we thought, wait a second, could we derive this data from somewhere, somewhere that's public and free?
Just like tools like OpenAI did where they crawl through tons of public data on the web and GitHub and use that as the basis of the training.
Ultimately, we realized, yes!
We wrote a simple crawler that uses a headless browser to pull up a website into it and then evaluate some JavaScript on the page to identify where the images are and what their bounding boxes are, which was able to generate a lot of training data for us really quickly.
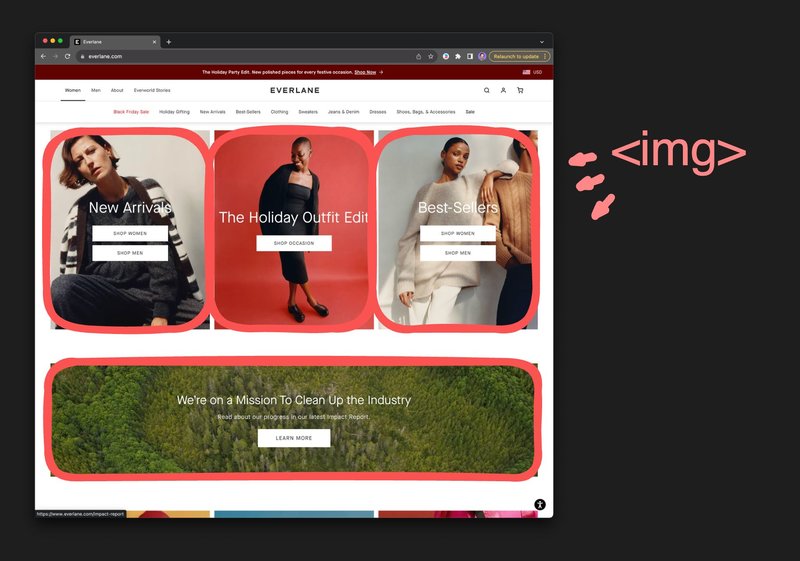
Now, keep in mind one critical thing: the quality of your model is entirely dependent on the quality of your data.
Let me say that louder:
The quality of your model is entirely dependent on the quality of your data
Don’t make the mistake of spending costly training time on imperfect data, only to give you (in the best case) an imperfect model that is only as accurate as the data that went in.
So, out of hundreds of examples we generated, we manually went through and used engineers to verify that every single bounding box was correct every time and used a visual tool to correct at any time there weren't.
In my experience, this can become one of the most complex areas of machine learning. Which is building your own tools to generate, QA, and fix data to ensure that your dataset is as immaculate as possible so that your model has the highest quality information to go off of.
Now, in the case of this object detection model, luckily, we used Google's Vertex AI, which has that exact tooling built in.
In fact, Vertex AI is how we uploaded all of that data and train the model without even needing to do that in code at all.
There are many tools you can use for training your own models, from hosted cloud services to a large array of great open-source libraries. We chose Vertex AI because it made it incredibly easy to choose our type of model, upload data, train our model, and deploy it.
So I’ll break down how we did this with Vertex AI, but the same steps can be applied to any type of training really.
To begin training, first we need to upload our dataset to Google Cloud.
All you need to do is go to the Vertex AI section of the Google cloud console and upload our dataset:
You can do it manually by selecting files from your computer and then use their visual tool to outline the areas that matter to us which is a huge help that we don't have to build that ourselves.
Or in our case, because we generated all of our data programmatically, we can just upload it to Google Cloud in this format, where you provide a path to an image and then list out the bounding boxes of the objects you want to identify.
{
  "imageGcsUri": "gs://ml-image-data-test/test1/Visual%20Editor%20%7C%20Builder.io.png",
  "boundingBoxAnnotations": [
    {
      "displayName": "image",
      "yMin": 0.0083,
      "xMin": 0.01465,
      "yMax": 0.03955,
      "xMax": 0.12695
    },
    {
      "displayName": "image",
      "yMin": 0.2998,
      "xMin": 0.01953,
      "yMax": 0.3918,
      "xMax": 0.32129
    },
    ...
  ]
}
Then back in Google cloud, you can manually verify or tweak your data as much as you need using the same visual tool.
And then once your dataset is in shape, all we need to do is train our model. I use all the default settings and I use the minimum amount of training hours.
Note that this is the one piece that will cost you some money (besides having your model hosted at the end too).
In this case, the minimum amount of training needed costs about $60. Now that's a lot cheaper than buying your own GPU and letting it run for hours or days at a time.
But if you don't want to pay a cloud provider training on your own machine is still an option. There's a lot of nice Python libraries that are not complicated to learn where you can do this too.
Once you hit “start training”, the training for us took about three real world hours.
Once your training is done you can find your training result and deploy your model with a button click.
The deploy can take a couple minutes and then you'll have an API endpoint that you can send an image and get back a set of bounding boxes with their confidence levels.
We can also use the UI right in the dashboard to test our resulting model out.
So to test it out now in Figma, I'm just going to take a screen grab of a portion of this Figma file because I'm lazy, and I can just upload it to the UI to test.
And there we go. We could see it did a decent job, but there are some mistakes here.
But there's something important to know: this UI is showing all possible images regardless of confidence. When I take my cursor and I hover over each area that has high confidence, those are spot on, and the strange ones are the ones with really low confidence.
This even gives you an API where you can specify that returned results should be above a certain confidence threshold. By looking at this, I think we want a threshold of at least 0.2.
And there you have it. This specialized model that we trained will run wildly faster and cheaper than an LLM.
When we broke down our problem, we found for image identification a specialized model was a much better solution. For building the layout hierarchy similarly, we made our own specialized model for that too.
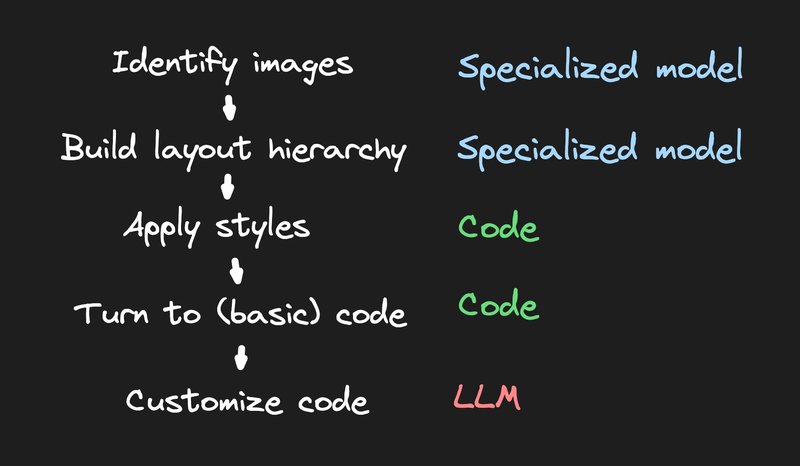
For styles and basic code generation, plain code was a perfect solution. And don’t forget: plain code is always the fastest, cheapest, easiest to test, easiest to debug, the most predictable, and just the best thing for most use cases - so whenever you can use it, absolutely just do that.
And then finally to allow people to customize their code name it better use different libraries and we already support we used an LLM for the final step.
Now that we're able to take a design and big baseline code LLMs are very good at taking basic code and making adjustments to the code, giving you new code with small changes back.
So despite all my complaints about LLMs and the fact that I still hate how slow and costly that step is in this pipeline. It was and continues to be the best solution for that one specific piece.
And now when we bring all that together, and launch the Builder.io Figma plugin, all I need to do is click generate code, and we will rapidly run through those specialized models, and launch it to the Builder.io Visual Editor where we've converted that design into responsive and pixel perfect code.
And luckily, because we created this entire tool chain all of that's in our control to make improvements on based on customer feedback every single day.
I would always recommend testing a language model (LLM) for your use case, especially for exploratory purposes.
However, if it doesn't meet your needs, consider writing plain old code as much as possible.
When you encounter bottlenecks, explore specialized models. You can train these by generating your own dataset and using products like Vertex AI, among others.
This approach will help you create a robust toolchain that can impress your users with exciting and potentially unprecedented feats of engineering.
I can't wait to see what you go and build!
Builder.io visually edits code, uses your design system, and sends pull requests.
Builder.io visually edits code, uses your design system, and sends pull requests.


 Connect a repo


