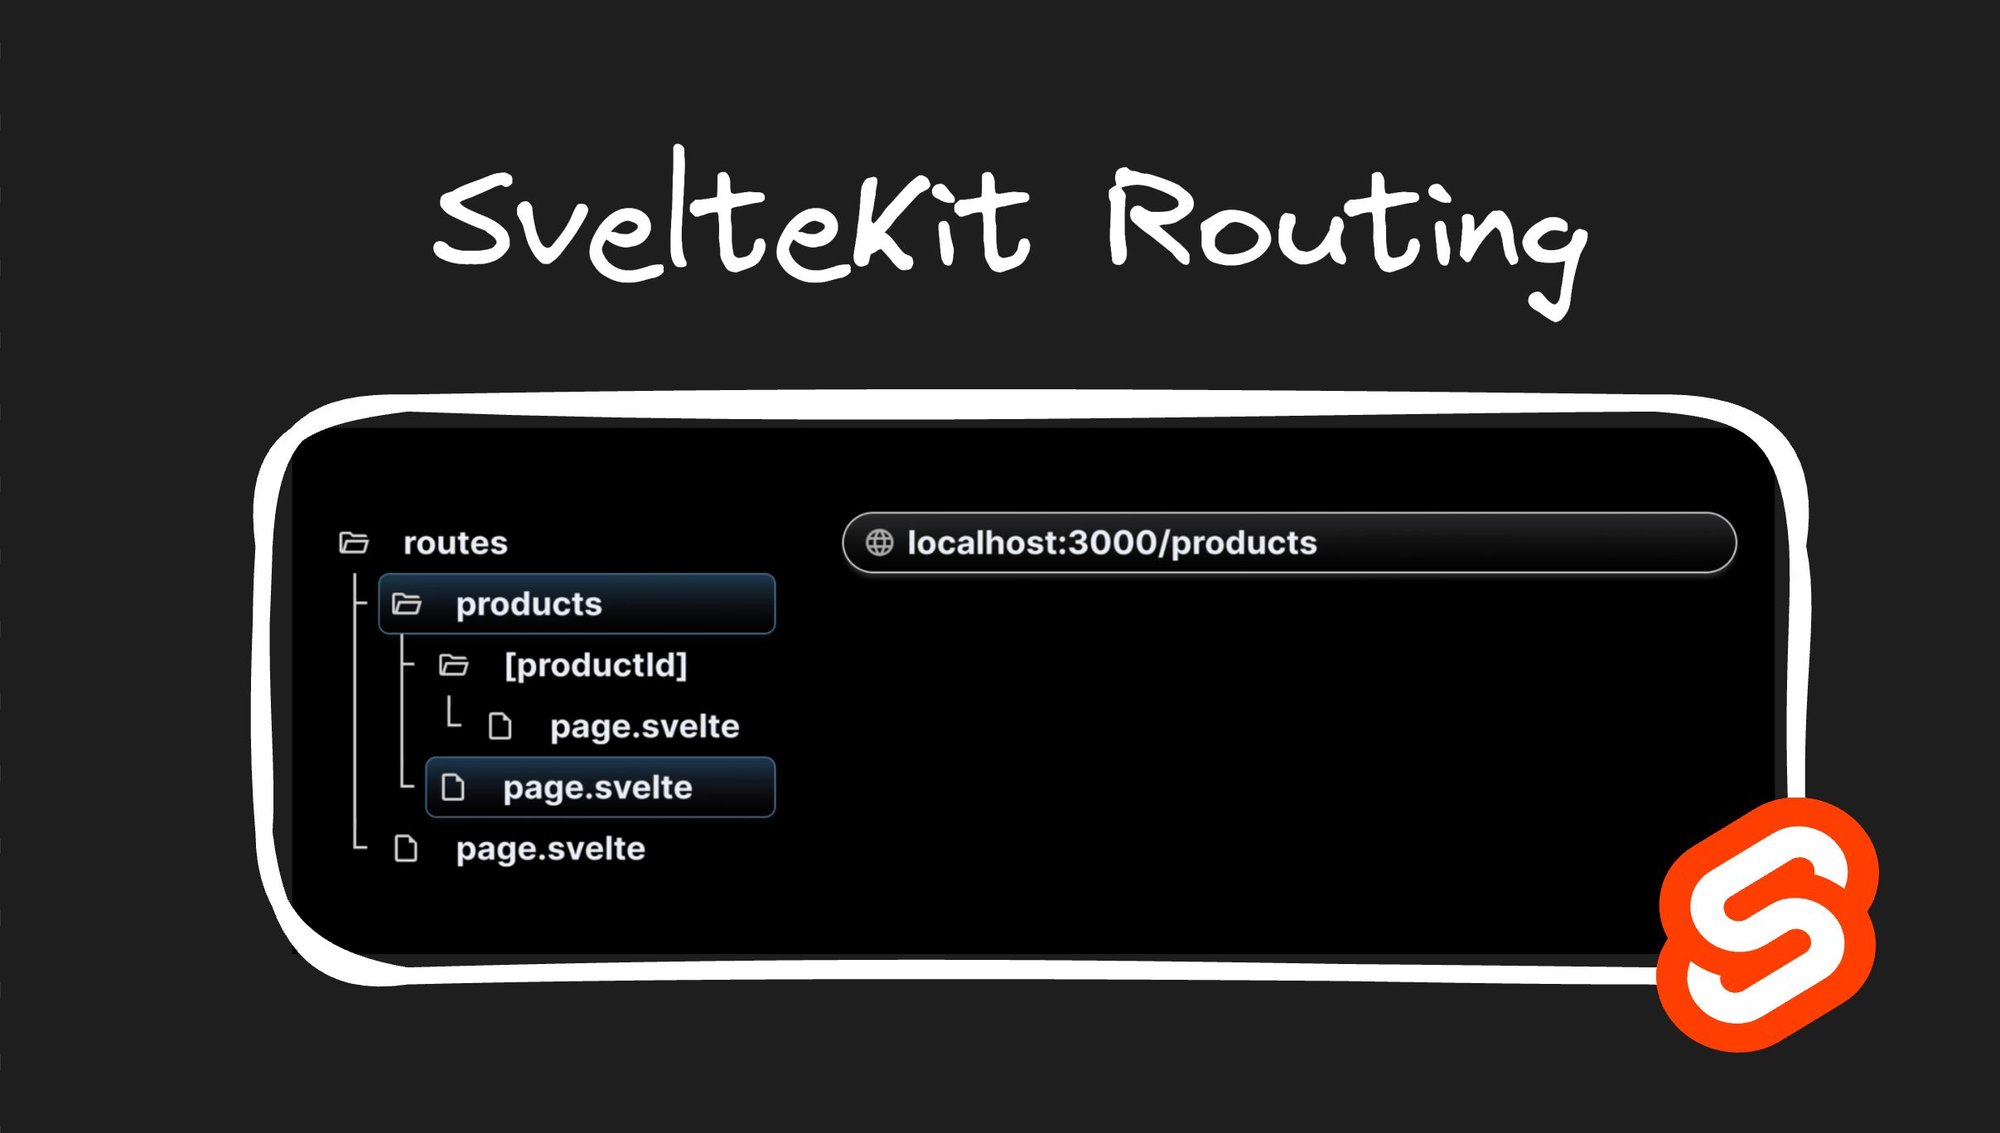
Routing plays a crucial role in the world of web development, allowing seamless navigation between various pages or views within an application. In this blog post, we will explore SvelteKit's routing capabilities with a visual guide.
To begin, create and run a new SvelteKit project using the following commands in the terminal:
npm create svelte@latest routing-app
cd my-app
npm install
npm run dev
Open the project in your preferred code editor and expand the src folder. For a fresh start, delete the routes folder to create routes from scratch.
SvelteKit employs a file-system-based routing mechanism, where URL paths in the browser are determined by files and folders in the codebase. Following conventions is crucial for proper routing functionality. Let's discuss and understand the different conventions.
To create a route for the root URL (localhost:5173), follow these steps:
- Create a
src/routesfolder. - Inside the
routesfolder, create apage.sveltefile. This file represents the route. - Define a simple Svelte component in the
page.sveltefile, to represent the “Home” page:
<h1>Welcome home!</h1>By following these conventions, we've successfully created our first route. Open your browser and navigate to localhost:5173 to see the "Welcome home!" message.
Let's now proceed to create two more routes: one for the About page and another for the Profile page.
- Create a
src/routes/aboutfolder. - Inside the
aboutfolder, create apage.sveltefile. This file represents the route. - Define a minimal Svelte component in the
page.sveltefile to represent the About page:
<h1>About me</h1>- Similarly, create a
src/routes/profilefolder. - Inside the
profilefolder, create apage.sveltefile. This file represents the route. - Define a simple Svelte component in the
page.sveltefile to represent the Profile page:
<h1>My profile</h1>When you visit the root URL, localhost:5173, the home page is still= displayed. However, if you navigate to localhost:5173/about, the About me page displays. Similarly, changing the URL to /profile renders the My profile page.
This demonstrates that routes are associated with a file based on the containing folder's name within the routes folder. The page.svelte file within the about folder corresponds to /about, while the page.svelte file within the profile folder corresponds to /profile.
In addition to basic routes, SvelteKit offers support for nested routes, so you can establish a hierarchical structure within your application. Let’s aim to render a page when the user navigates to the URL localhost:5173/blog. Furthermore, we need to render pages for localhost:5173/blog/first and localhost:5173/blog/second.
To implement nested routes, follow these steps:
- Create a
src/routes/blogfolder. - Inside the
blogfolder, create apage.sveltefile for the main blog page:
<h1>My blog</h1>- Navigate to
localhost:5173/blogto see the My blog page. - To implement
/blog/firstand/blog/secondroutes, createpage.sveltefiles in thesrc/routes/blog/firstandsrc/routes/blog/secondfolders:
// blog/first/page.svelte

<h1>First blog post</h1>
// blog/second/page.svelte
<h1>Second blog post</h1>Now, navigating to localhost:5173/blog/first displays the first blog post, and localhost:5173/blog/second shows the second blog post.
By creating a nested folder structure, SvelteKit automatically routes the files accordingly. This simplifies the process of creating nested routes and enhances the organization and structure of your application.
Predefined paths like /blog/first and /blog/second may not always be suitable for complex applications with hundreds of routes. SvelteKit supports dynamic routes to handle such scenarios. Let’s create dynamic routes to handle a product listing and detail page.
To create dynamic routes, follow these steps:
- Create a
src/routes/productsfolder. - Inside the
productsfolder, create apage.sveltefile to display a list of three products:
<h1>Product List</h1>
<h2>Product 1</h2>
<h2>Product 2</h2>
<h2>Product 3</h2>- By navigating to
localhost:5173/productsin the browser, the list of products displays. - For the details page, within the
productsfolder, create a new folder named[productId]. The square brackets indicate a dynamic route segment. - Inside the
[productId]folder, create apage.sveltefile:
<h1>Details about the product</h1>Now, when you navigate to localhost:5173/products/1, the product details page displays. Similarly, accessing /products/2, /products/3, or even /products/100 displays the same details page. [productId] is the dynamic route segment that can accommodate values like 1, 2, 3, and so on.
To display the specific product ID, you can make use of the stores module from SvelteKit. Modify the component as follows:
<script>
  import {page} from '$app/stores';
  const productId = $page.params.productId;
</script>

<h1>Product {productId} details</h1>
Now, when you navigate to localhost:5173/products/1, the details about product 1 displays. Similarly, visiting /products/100 will display details about product 100.
Dynamic routes are beneficial when implementing the list-detail pattern in any UI application. By understanding how to create dynamic routes in SvelteKit, you can build flexible and scalable applications that adapt to varying user interactions.
In the previous section, we learned about dynamic routes. Now, let's take it a step further and explore nested dynamic routes.
Complex applications often require multiple dynamic route segments. For instance, when navigating to /products/1, the user expects the details for product 1. Similarly, visiting /products/1/reviews/1 should display the first review for that product. Let's find out how we can achieve this.
To create nested dynamic routes, follow these steps:
- Create a
src/routes/products/[productId]/reviewsfolder. This structure takes us to the route /products/productId/reviews. However, we also need a dynamicreviewId. - Within the
reviewsfolder, create a new folder named[reviewId]. Once again, the square brackets indicate a dynamic route segment. - Inside the
[reviewId]folder, create apage.sveltefile where we'll define a Svelte component to display both theproductIdand thereviewId.
<script>
  import { page } from "$app/stores";
  const { productId, reviewId } = $page.params;
</script>

<h1>Review {reviewId} for product {productId}</h1>
Now, if we navigate to localhost:5173/products/1/reviews/1 in the browser, the expected text displays. Similarly, navigating to productId 100 and reviewId 5 reflects the corresponding IDs in the UI.
The key takeaway from this section is that it is possible to create nested dynamic routes by having dynamic segments in the folder names.
SvelteKit provides the catch-all routes feature which allows for flexible routing. Let's say we want to create a documentation site with multiple features and concepts, where each concept has its own unique route. Instead of creating separate files for each route, we can use a catch-all route.
To implement a catch-all route, follow these steps:
- Create a
src/routes/docsfolder. - Inside the
docsfolder, create a folder with a special name recognized by SvelteKit. Use square brackets and three dots (for example,[...slug]) to enclose a name of your choice. - Inside the
slugfolder, create apage.sveltefile with a basic Svelte component representing the documentation home page.
<h1>Docs home page</h1>- To access the different segments in the URL, rely on the stores module that SvelteKit provides. For example:
localhost:5173/docs/routing/catch-all-segmentscan render the following component:
<script>
  import {page} from '$app/stores';
  const slugArr = $page.params.slug.split('/')
</script>

{#if slugArr.length === 1}
<h1>Viewing docs for feature {slugArr[0]}</h1>
{:else if slugArr.length === 2}
<h1>Viewing docs for feature {slugArr[0]} and concept {slugArr[1]}</h1>
{/if}
With catch-all segments, you can create a hierarchical structure for your routes, allowing better organization and SEO, while reusing a single file for different variations of the URL. This approach is particularly useful for documentation websites.
Routing is an integral part of web development, so users can navigate between different pages within an application. SvelteKit simplifies routing through its file-system-based routing mechanism.
In this blog post, we explored the basics of routing in SvelteKit. We discussed routing conventions, created routes for different scenarios, and highlighted SvelteKit’s convention over configuration approach for routing.
With SvelteKit, you can easily define and manage routes by leveraging the file and folder structure of your codebase, eliminating the need for additional routing configuration.
Tip: Visit our Svelte and Builder.io Hub
Introducing Visual Copilot: convert Figma designs to high quality code in a single click.


