Writing tests is an important part of any software development project. React Testing Library is a popular testing tool for React applications. However, even with its automatic logging, it can be difficult to identify why a test has failed. In this post, we'll explore three tips for writing better tests from the start.
React Testing Library provides automatic logging when a test case fails, which can be useful in understanding why an assertion failed. However, sometimes you need more information to debug a failed test.
Incorrectly querying a DOM element that doesn't exist is a common reason for failed tests. One way to avoid this scenario is to use screen.debug() to visualize the DOM without having to wait for an assertion to fail.
Here's an example of a Person component, its corresponding test, and what is logged by screen.debug().
// Person.tsx

import { useState } from "react";

export const Person = () => {
  const [name, setName] = useState("");
  const [age, setAge] = useState(0);
  return (
    <div>
      <input
        type="text"
        name="name"
        value={name}
        onChange={(e) => setName(e.target.value)}
      />
      <input
        type="number"
        name="age"
        value={age}
        onChange={(e) => setAge(parseInt(e.target.value))}
      />
      <h1>{name}</h1>
      <h1>{age}</h1>
    </div>
  );
};

// Person.test.tsx

import { render, screen } from "@testing-library/react";
import { Person } from "./Person";

describe("Person", () => {
  test("renders correctly", () => {
    render(<Person />);
    screen.debug()
  });
});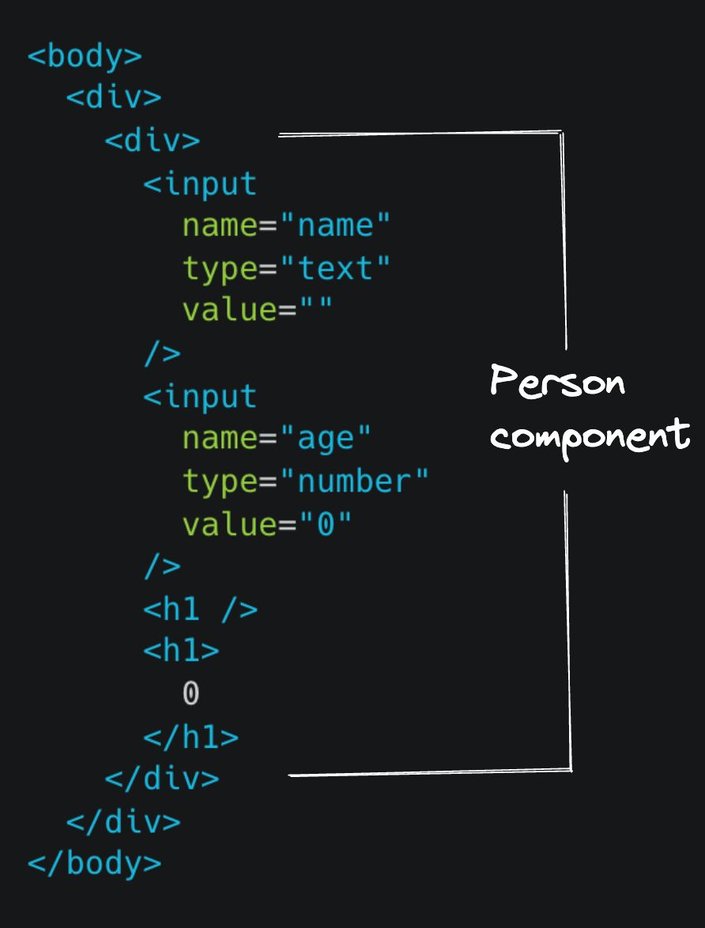
The screen.debug() method can help you actively visualize the DOM and write your test case based on what is printed to the console. It also supports debugging a single element, or an array of elements.
Another reason for a failing test is querying an element by its role incorrectly. This can be challenging, as it's almost impossible to know the role of every single HTML element in your component. One solution is to consult a table of HTML elements with their default and desired roles, but this can be time-consuming and overwhelming. Instead, you can use the logRoles() method to print out a list of all the implicit ARIA roles within a tree of DOM nodes, each role containing a list of all the nodes which match that role.
Below is the Person component and its corresponding test. Additionally, the output of logRoles() is shown when the rendered component is passed as an argument. Before examining the output, can you guess the implicit ARIA role for an HTML input element with the type attribute set to number?
// Person.test.tsx

import { render, logRoles } from "@testing-library/react";
import { Person } from "./Person";

describe("Person", () => {
  test("renders correctly", () => {
    const view = render(<Person />);
    logRoles(view.container);
  });
});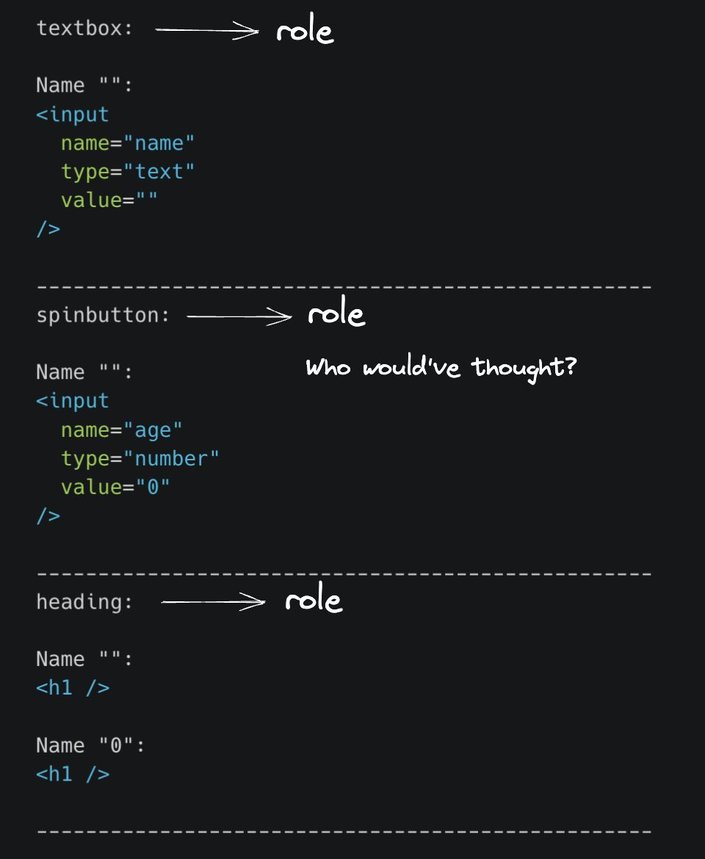
The logRoles() method can help you list the implicit ARIA roles within a tree of DOM nodes and help you correct your tests before they fail.
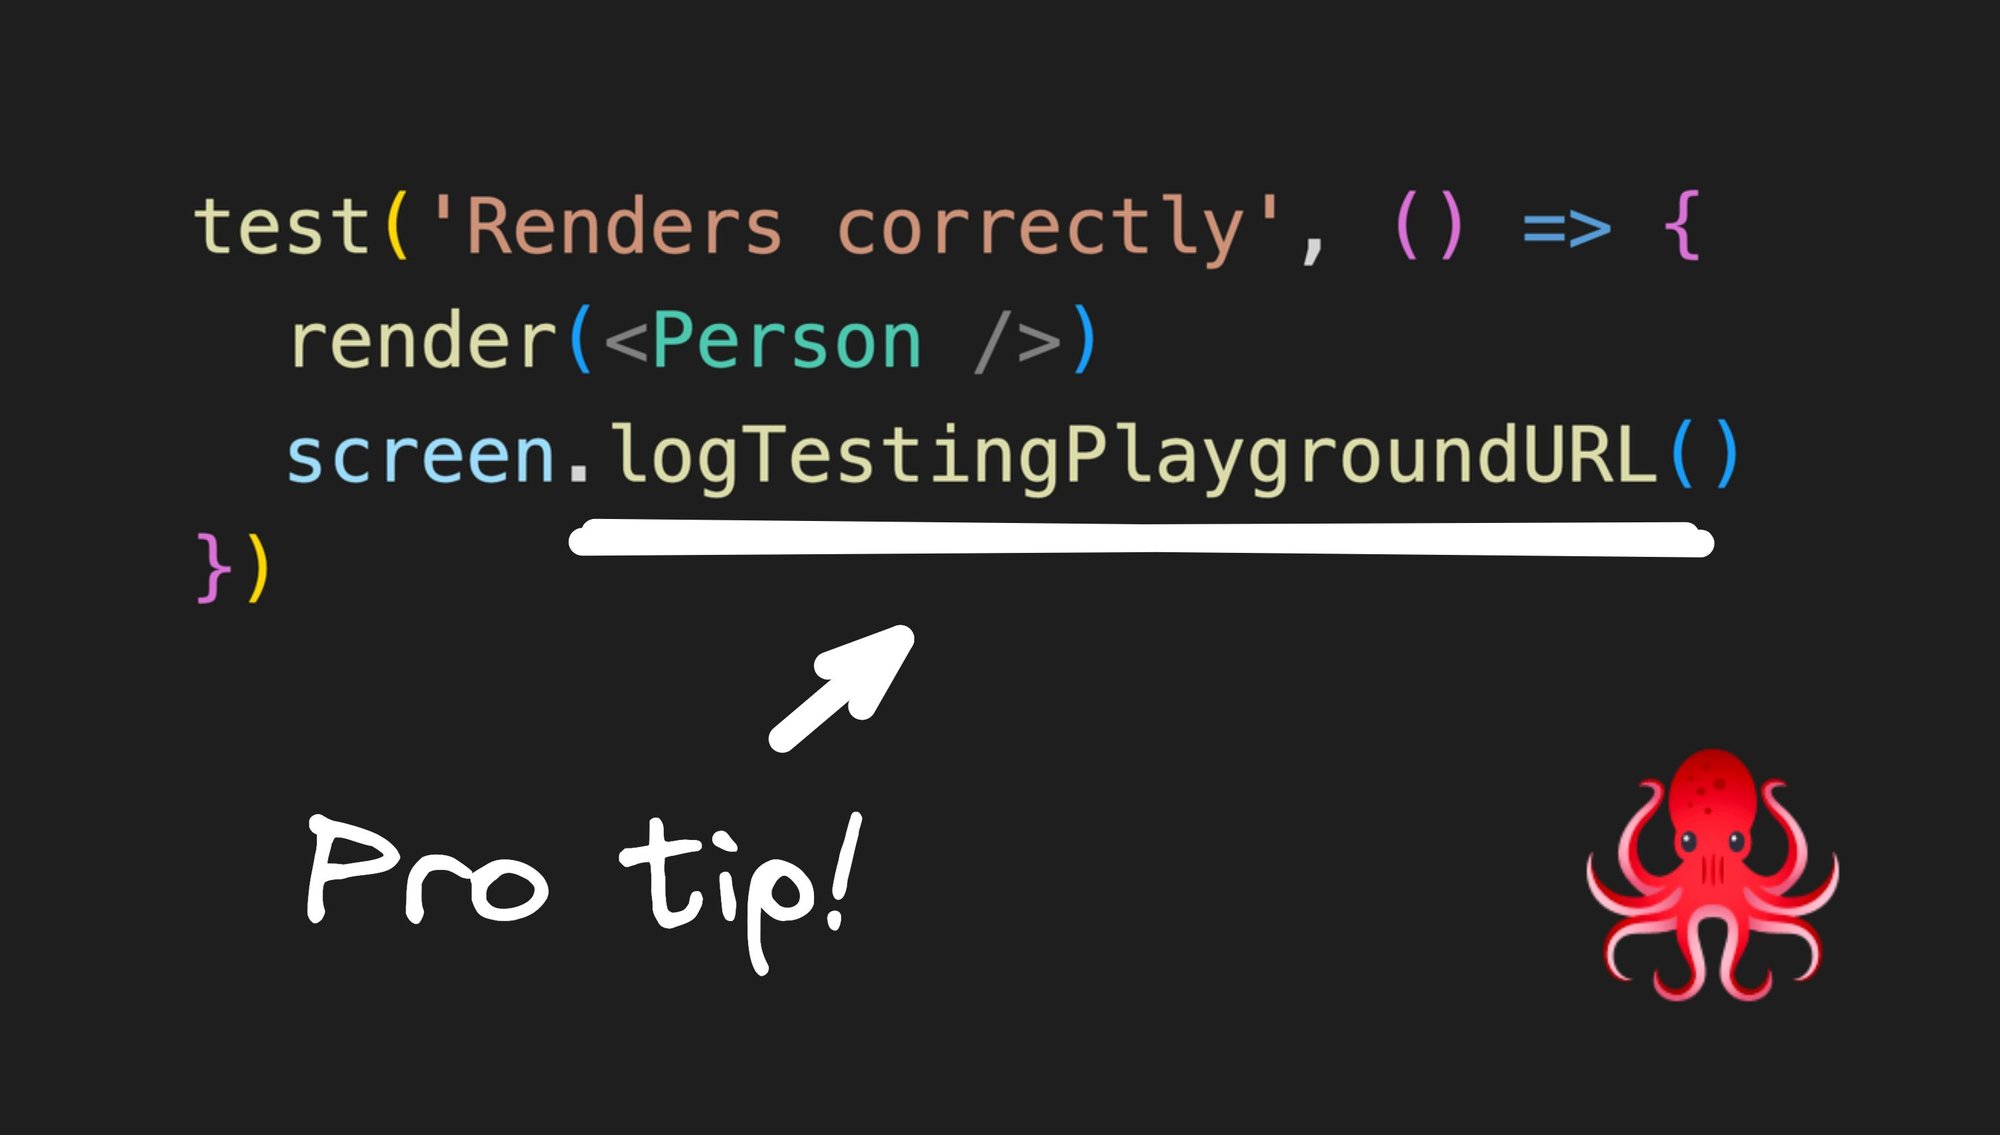
For beginners, identifying the right query method can be a struggle and often a reason for failing tests. The logTestingPlaygroundURL() method on the screen object can help you write correct queries by generating a URL when the test is run. Clicking on the link will open the Testing Playground tool with your component HTML already in place. You can then select an element to identify the best way to query an element for your test.
Here’s the Person component test with a call to screen.logTestingPlaygroundURL().
// Person.test.tsx

import { render, screen } from "@testing-library/react";
import { Person } from "./Person";

describe("Person", () => {
  test("renders correctly", () => {
    render(<Person />);
    screen.logTestingPlaygroundURL();
  });
});
In the terminal, the method logs and returns a URL that can be opened in a browser.

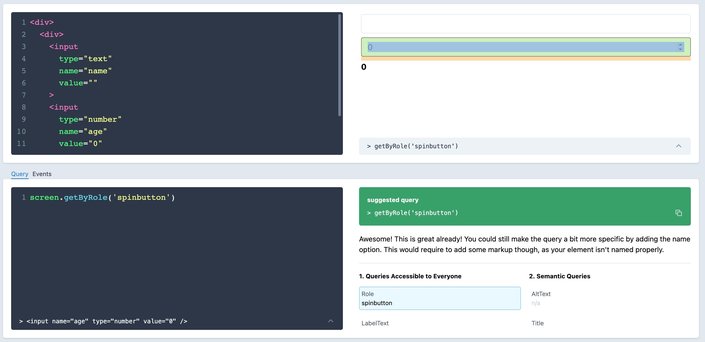
To select an element in your test, click on it from the UI panel located in the top right section. This will generate the best query to use for selecting that element, which will significantly reduce the number of times your test fails on the first try.
The React Testing Library is an incredibly useful tool for testing React applications. Using these three tips, you can write better tests, avoid common issues that can lead to failed tests, and write more efficient and effective tests. Also, check out my playlist on React Testing to learn more about testing React apps with Jest and the Testing Library.
Introducing Visual Copilot: convert Figma designs to high quality code in a single click.


