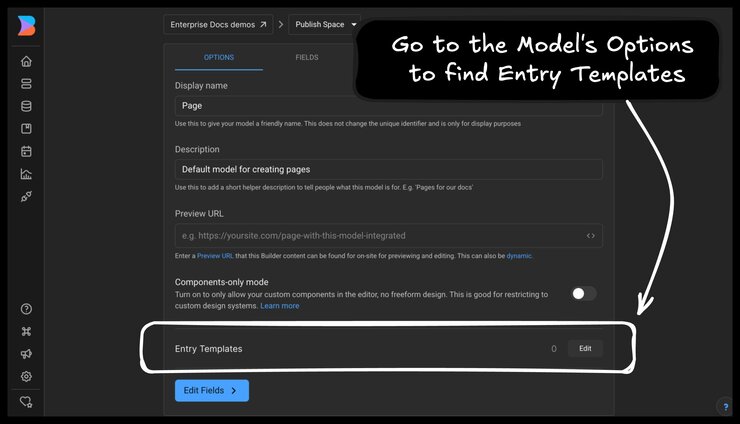
Entry templates use Builder Models to preconfigure content entries with predefined layouts, fields, and visual elements. Additionally, templates provide a consistent starting point for new content entries across Page, Section, and Data models.
Entry templates provide:
- Consistent content structure: standardize the layout of blog posts, marketing pages, and landing pages by automatically including required headers, footers, and core sections.
- Better content governance: symbols and locked layers maintain a consistent page structure, provide centralized control, and help content creators focus on writing.
- Efficient content creation: start new content with pre-filled fields and structures instead of building from scratch. Choose from multiple template options to match the needs of each content entry.
- Go to Models.
- Select a model and go to Options.
- Go to Entry Templates and click Edit.
- Click + Add Entry and select an entry.
- To require template selection, turn on the Require semplate selection toggle in the Entry Template dialogue box.
- Optional: Add, view, or delete multiple templates.

For Page layouts using Symbols, create a Symbol with child elements that define your desired Page layout and set it as a required default template.
- Go to Content.
- Click + New Entry.
- Select a Model.
- In the dialogue, provide Name and URL.
- Click Create Page.
- In the Choose a template dialogue, select a template.
- Optional: Click Start Blank to create a blank entry template. To enable the Start Blank option, turn off the Require template selection toggle in the Entry Template dialogue during set up process.
- Use locked layers in Symbols to prevent unauthorized access.
- Create dedicated Models to manage multiple template variations.
- Require template selection option may provide consistency for structured content types.
- Regularly review and update templates to align with current design and content standards.


