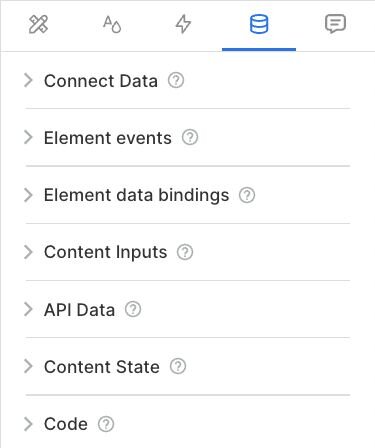
Data binding is a powerful feature in Builder. Bind any Builder block to a data source, or to a custom code value.
Bind to data for dynamic content:
- Display text, images, or videos based on the bound data.
- Automatically update content in Builder when the data changes.
- Repeat content for each entry in a dataset to display lists of content.
- Use conditions to control how and what to display.
Bind to code for interactivity:
- Bind blocks to values on Builder state to create Symbols with Inputs.
- Bind to code values to fully customize how a block appears or behaves.
To use data binding, you must have data somewhere that you can bind to. To get data, you can:
- create your own data in Builder Data Models and entries
- connect to a data provider, such as with a plugin, or use an API
- write a fetch in the Builder Code Panel and load it onto state
- pass data from your app into a Builder component
- make your own plugin
When connecting data, the technique you use depends on where your data resides. This section covers connecting to Builder data, using a plugin, and using an API endpoint.
When your data is in Builder, using it in your content entries involves selecting which data you want to use. For details on how to create Builder data, read Data Models.
If your data resides in Builder:
- Open the content entry that you'd like to use your data in.
- Go to the Data tab.
- Expand the Connect Data section and choose Builder.io if your data resides in Builder.
- In the modal that opens entitled Pick a resource, choose your resource.
- When you choose a resource, it populates the Connect Data section of the Data tab.
- Click the Pick An Entry and select the appropriate entry.
A plugin gives you a way to connect to a data provider. Whether you use one of the built-in plugins or make one yourself, the connection process is the same.
To connect data through a plugin:
- Make sure the plugin has already been enabled. For details, read Setting Up Built-in Plugins. If you don't have access to your codebase your developer might have to configure this part for you.
- When the plugin has been set up, open a content entry.
- In the Builder Visual Editor, go to the Data tab.
- Expand the Connect Data section and choose your plugin. In the modal that opens, entitled Pick a resource, choose your resource.
- When you choose a resource, it populates the Connect Data section of the Data tab.
- Click the Pick An Entry and select the appropriate entry.
Builder offers a number of built-in plugins, many of which are for connecting popular data providers to Builder. For a list of the available plugins especially suited to data binding, read Built-in plugins for data binding or, for a complete list of all plugins, go the Plugins section of Builder in your account.
To connect data using an API:
- In the Builder Visual Editor, go to the Data tab.
- Expand the API Data section and click the + API Data Source button.
- In the dialogue that opens, provide a Property name that describes the data; for example
todos
. - In the URL field, paste in the endpoint for the API. This example uses
https://jsonplaceholder.typicode.com/todos
. - Click the Done button.
To connect data using an API through a fetch function, write a JavaScript function that retrieves the data from the API endpoint and binds it to the Builder state. This way you can dynamically update your content based on external data sources.
- In the Visual Editor, go to the Data tab.
- Expand the Code section and click the + Edit Content JS + CSS button.
- In the dialogue that opens, write your fetch function to load data from an API so that your data will be accessible in the Builder state object. In this example, the data is available in
state.todos
:
async function fetchData() {
const response = await fetch('https://jsonplaceholder.typicode.com/todos');
const data = await response.json();
state.todos = data; // Assign the data to Builder's state
}
fetchData();
To connect data using an API:
- In the Builder Visual Editor, go to the Data tab.
- Expand the Code section and click the + Edit Content JS + CSS button.
- In the dialogue that opens, add your code to fetch the data from the API.
For more detailed information, including repeating elements based on API data, read Connecting API Data. For details on using your code within the Visual Editor, visit Custom Code in the Visual Editor.
After you’ve connected your data, you can use it within Builder to dynamically populate content.
To bind data to a component:
- Select the component, for example a Text block or an Image block, in the Visual Editor.
- In the Data tab, click on the data provider icon or the +Connect Data button.
- Choose the resource or collection you want to use.
- In the Options tab, click on the Data Binding icon (data icon with a small pencil) next to the property you want to bind.
- Select the desired field from the data source.
The component now displays the value from the bound data field.
Repeat this process to bind data to multiple components and properties within your Builder app.
This section covers some practical examples of data binding shortcuts.
Conditional rendering
You can use data bindings to conditionally display elements based on certain criteria. For example, you can show or hide elements based on whether a user is logged in or based on the value of an API response:
state.user ? 'Welcome, ' + state.user.name : 'Please log in'
Repeating over arrays
Use repeatForEach()
to iterate over arrays (lists). For instance, if you have an array of products fetched from an API, you can loop through them and display product cards dynamically:
repeatForEach(state.products, (product) => (
<ProductCard key={product.id} name={product.name} price={product.price} />
))
Binding styles dynamically
Data bindings mean you can dynamically bind styles. This is useful when you need to change the appearance of elements based on data values:
style.backgroundColor = state.isActive ? 'green' : 'red';
Dynamic text updates
You can bind dynamic text values to UI components, such as updating the heading of a section based on fetched data or user input:
Your cart contains ${state.cart.items.length} items.
These plugins offer various data integration possibilities, so you can connect and leverage data from different sources within your Builder content and experiences. With these data providers, you can create dynamic, personalized, and data-driven websites and applications.
- Elastic Path: Use your Elastic Path products and categories with Builder.
- Shopify: Use theShopify plugin to connect your Shopify store data, such as products, collections, and orders, to your Builder content.
- Smartling: Smartling streamlines content localization workflows. It can provide translated content data to Builder, facilitating the creation of multilingual sites and experiences.
- Salesforce B2C Commerce: This plugin allows you to connect to the Salesforce B2C Commerce API, enabling you to access and integrate data related to products, catalogs, and customer information for personalized commerce experiences.
- Contentstack: The Contentstack plugin enables you to bring your content types and entries from Contentstack's headless CMS into Builder for use within Builder's Visual Editor.
- BigCommerce: Use the BigCommerce plugin to connect your BigCommerce store data, including products, categories, and pricing, to your Builder content and experiences.
- Adobe Commerce (Magento): This plugin enables integration with Adobe Commerce (formerly Magento), providing access to ecommerce data such as products, catalogs, and customer information for building engaging commerce experiences.
- Commercetools: Connect to the commercetools API, a headless commerce platform. It provides access to commerce data, so you can build flexible and scalable ecommerce experiences.
- Kontent.ai: Kontent.ai helps you to plan, create, and deliver experiences using structured content data from Kontent.ai.
- Kibo: Connect your Builder app to your Kibo product catalog.
- Contentful: The Contentful plugin helps you bring your content types and entries from Contentful into Builder's Visual Editor.
For more detail, read Overview of Built-in Plugins in the developer documentation. To go directly to the built-in plugins in Builder, open the Integrations section of the Builder app.