in beta
for developers
After creating a design with Figma, integrate Builder with your codebase to enable live code generation. Builder generates code directly into your codebase, using the design you've provided and your own code files for seamless integration.
- Use the Builder Figma plugin and the Code Generation CLI tool to generate code into your codebase.
- Prompt Code Generation CLI to make stylistic and functional modifications to the design of your generated code.
To use Code Generation CLI, you must have:
- A Builder account with an accessible Develop Space.
- A Figma account with a design ready to export and the Builder Figma plugin.
- A local machine with Node.js 18 or higher installed.
- A local codebase with a front-end framework supported by Builder. Code Generation CLI works best with React-based projects.
Use of Code Generation CLI requires you to navigate between Figma, Builder, and your codebase.
First, ensure that you have the Builder Figma plugin within Figma. Once you have done so, complete the following steps.
Within Figma:
- Select your design. For large designs, you may have better success by selecting one portion of your design.
- Open the Builder Figma plugin.
- Go to the Export tab within the plugin.
- Click the Export Design button.
- Builder's AI generates multiple design options. Choose one.
Once you see Export Successful, you are ready to move on to the next step.
The video below demonstrates the process of selecting a design within Figma and then using the Builder Figma plugin to export a design.
To use Code Generation CLI:
- Copy the command-line script within the plugin's window. This command begins with
npx @builder.io/dev-tools@latest code. - Go to your codebase's directory within your terminal.
- Paste and run the command from the Builder Figma plugin.
At this point, Code Generation CLI begins to scan through your project and authenticate with Builder.
To authenticate with Builder, follow the prompts provided within the command line and browser. Connect to a Develop Space when authenticating.
If you ever need to re-authenticate with Builder and Figma via the command line, you can use the following command to trigger the authentication process.
npx builder.io authAfter successfully connecting to your space, you are ready to move on to the next step.
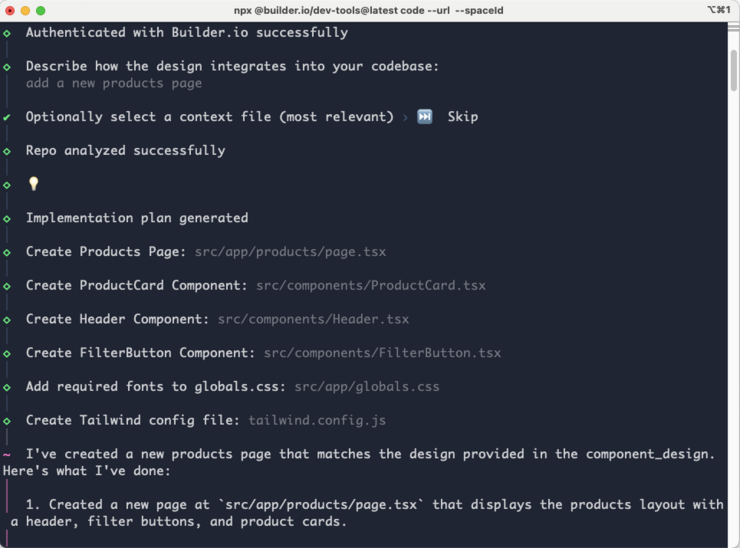
Once you have been prompted within the command line to describe how your design integrates with your codebase, interact with the command line as you would any other AI.
Provide specificity and context within your prompts whenever possible. For example:
- ✅ Create a responsive product page with a path of "/products".
- ❌ Create a new page.
Code Generation CLI receives your request, generating code within your codebase. It then identifies which files it has changed and generates a summary of the changes it made.

You are then provided with three options:
- Accept and Continue. This option accepts the current changes and then offers a new prompt for additional suggestions to the design or code.
- Refine. This option marks the generated code as unacceptable and provides a new chance to refine your prompt.
- Undo last changes. All of the changes just made are be reverted, after which a new prompt is offered.
Continue to prompt Code Generation CLI to adjust your application as desired. When you are done, follow the command-line instructions to quit the tool.

Note: After providing a prompt, Code Generation CLI asks for an optional context file. This step is useful in a large codebase or in a situation where your prompt could refer to multiple pieces of the codebase.
The video below demonstrates the process of running the CLI command and providing a prompt.
Learn more about the Builder Figma plugin or see Figma export modes for more details on how to export your design from Figma. After that, learn to Map components with the CLI.


