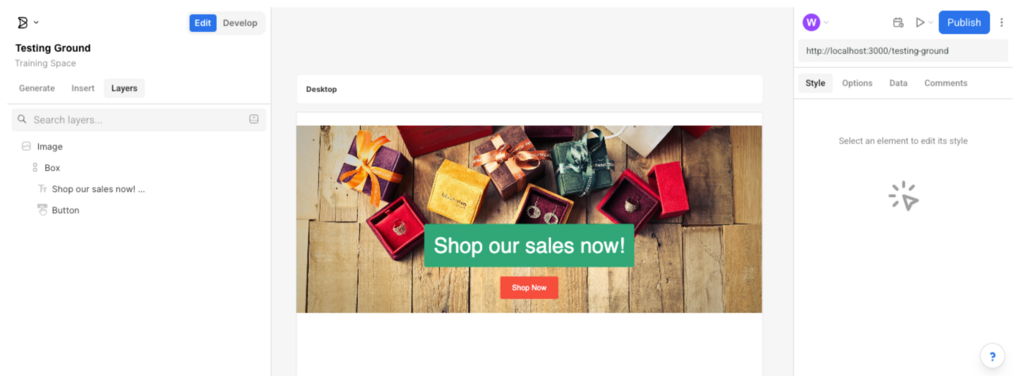
A staple of web design, create a hero block within Builder's Visual Editor.
- Create a hero design on a content entry with a background image.
- Align blocks horizontally and vertically.
This tutorial results in a full-width image within a content entry, overlayed by text and a button. To follow this tutorial, create a new content entry within Builder.

Begin by adding an image to your content entry. Upload your own image or choose one from Builder's stock photos.
Next, modify the Image block's dimension. Set the height to have a minimum value and the width to Full page width. Your image horizontally extends to the edge of the content entry.
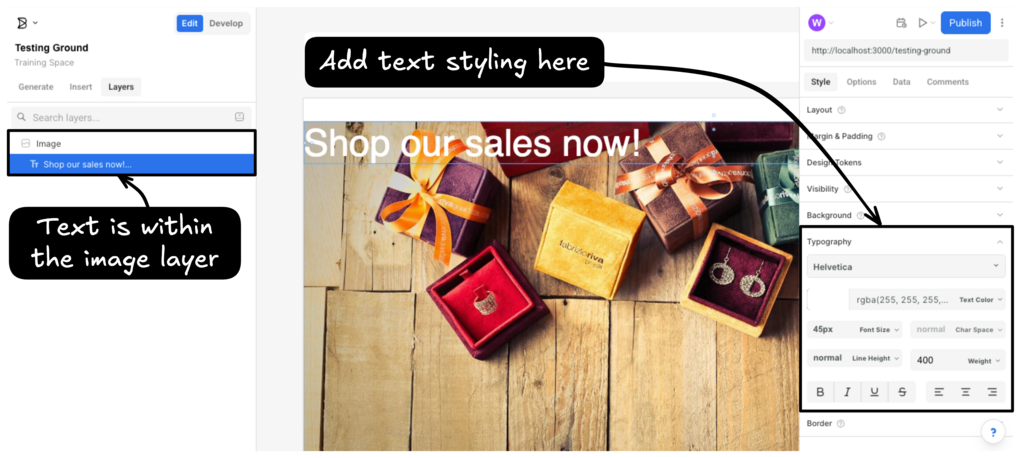
Drag a Text block form the Insert tab into the Image block.
You may adjust the style of your text as you wish. In the image below, the text is set to a size of 45px, a font of Helvetica, and a color of white.

Next, style your text with a background color and border radius. Add some padding to your text as well. Finally, use the Layout panel and choose Center Horizontally under the Align option.
Drag a Button block form the Insert tab into the Image block, underneath your text.
Adjust the style of the button as you wish. You may want to change the color, font, or text size. Then, choose Center Horizontally under the Align option in the Layout panel.
Add a Box block within your Image block. By default, Box blocks have a set height. Removing this height ensures your content entry renders properly.
Then, drag both the Text and Button blocks within the Box block. While possible to do directly within the Visual Editor, it can be easier to do so in the Layers panel.
Adjust the alignment of the box within the Layout panel, clicking the Align to the bottom side option. Depending on your image, one of the other options may looks better. You may also want to add padding or margin to improve the layout of your hero.
Learn more about the Insert and Style tabs within the Visual Editor to get the most out of your content entries. Or, learn how to Create and edit content with Visual Copilot, leveraging Builder's AI to generate designs for you.


